Documentation & FAQ
Last updated on November 25, 2025
Last updated on November 25, 2025
Our web app provides you with comprehensive tools for managing your customers, projects, inspections, and much more. Customize reportly entirely to your individual needs and optimize your workflows.
Learn more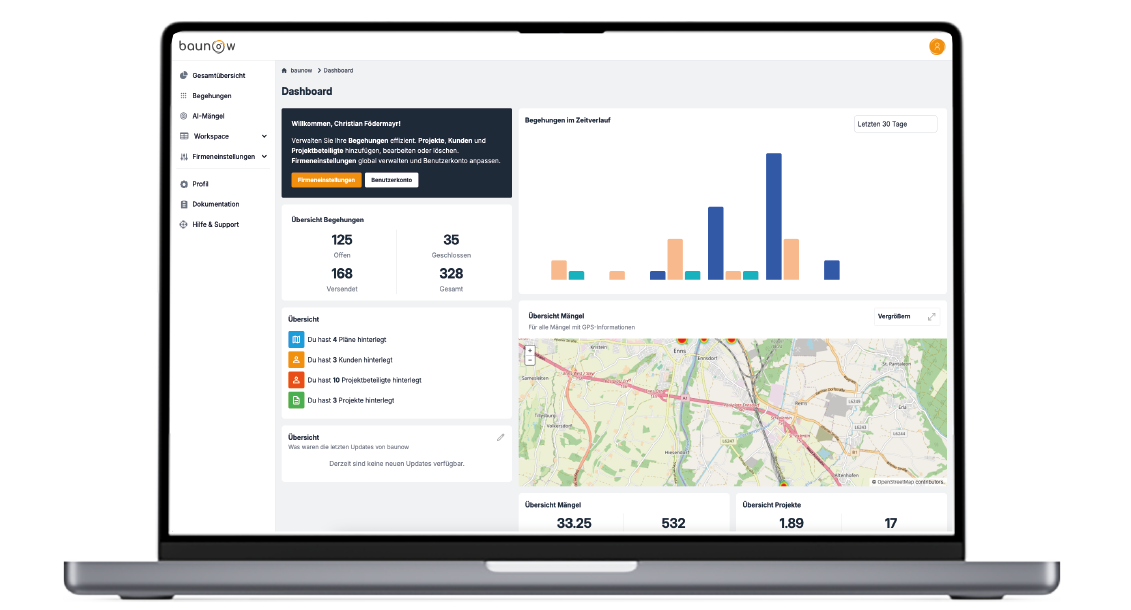
Our app allows you to easily document all defects and inspections. Thanks to its intuitive structure, you can effortlessly create new issues and inspections and convert them into clear reports within seconds.
Learn more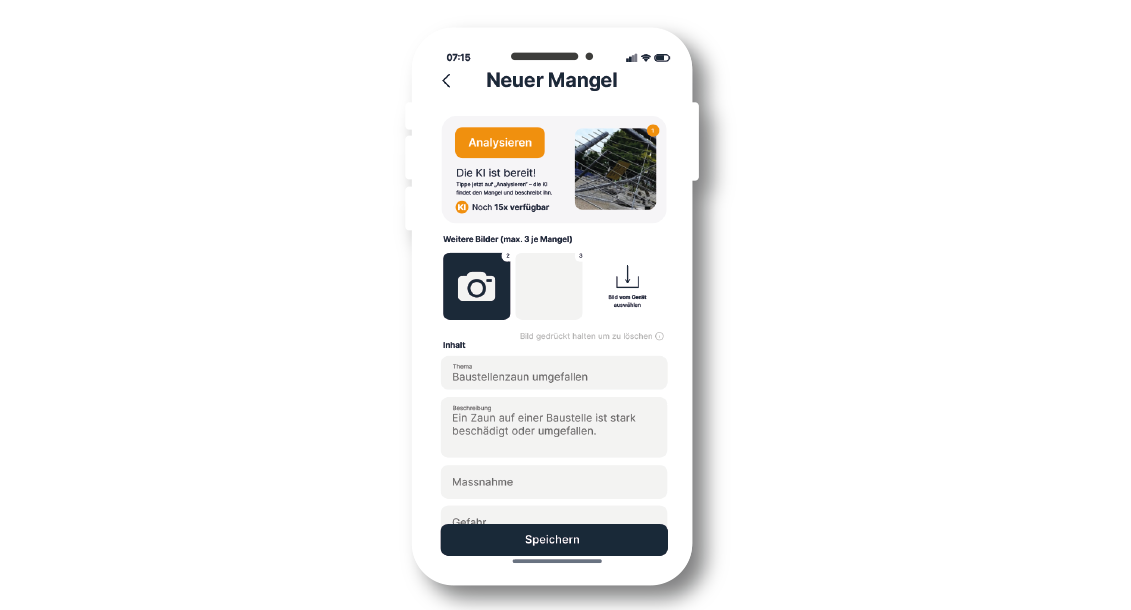
When visiting the website, you will be taken directly to the login screen unless your session is still active — in that case, you will be redirected automatically. Here you can log in using your email and password.
Once this process is completed, you will be forwarded to your account.
If you have forgotten your password, you can reset it at any time in the login panel.
If you have any questions or encounter problems, our team is happy to help via email at manuel@reportly.app.
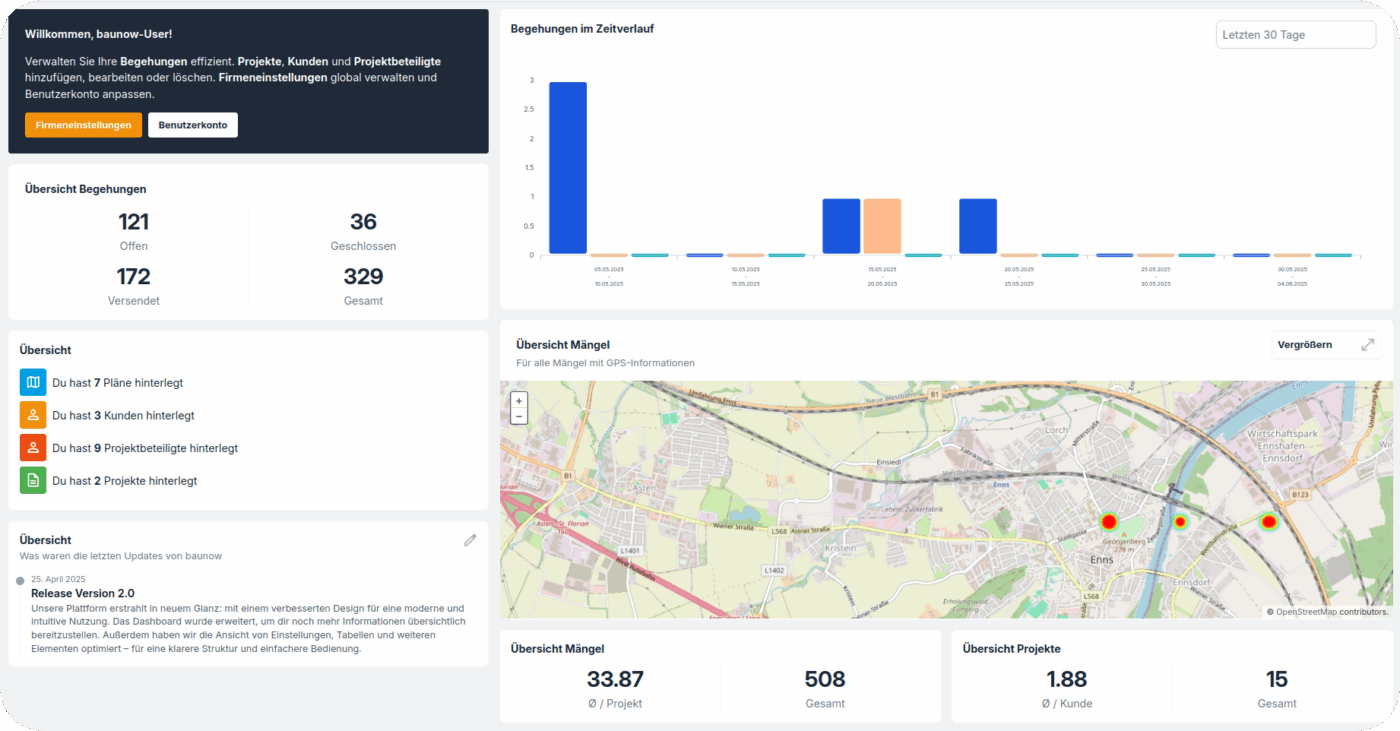
Our dashboard provides you with a structured overview in addition to several shortcuts:
– your previous activities,
– your inspections, presented as a visual graphic,
– a geographic summary of the issues you have recorded,
as well as a tab with the most important news and newest features directly from the reportly team.
Create a new customer ![]()
A new customer can be created using the button, which redirects you to a form containing several options regarding the new customer.
Fields marked with * are mandatory. In addition to name, abbreviation, company logo, and additional information/comments, you can also manage evaluation criteria. Furthermore, a template can be loaded which may require additional mandatory fields for communication with contractors.
Edit existing customers ![]()
Existing customers can be edited in the customer overview by clicking the gear icon next to the respective customer.
Afterwards, the values defined during creation can be adjusted.
Delete existing customers ![]()
Customers can be deleted in the overview using the button located to the left of the customer entry. The action must then be confirmed in a pop-up window.
Create a new project ![]()
Similar to creating a new customer, a new project is also created via a button. A pop-up window opens, offering configuration options. The mandatory fields are automatically selected based on the chosen customer. These must be filled in to ensure that emails are sent correctly and communication runs smoothly.
Edit existing projects ![]()
This process is very similar to editing customers, as editing is also done via the gear icon next to the project. Please note that mandatory fields defined by the customer template cannot be removed.
Delete existing projects ![]()
Projects can be removed using the button located on the far right of the respective row. As with deleting customers, all related inspections and data entries will also be deleted.
Create new contractors ![]()
Just like in previous sections, contractors can also be created using the button, with configuration performed in the pop-up window.
Edit existing contractors ![]()
Existing contractors can be easily adjusted using the gear icon located in the same row.
Delete existing contractors ![]()
The deletion process works similarly by clicking the button and confirming the action in the pop-up window.
The profile section is where settings and adjustments for the individual user can be made. This includes adding a phone number, changing an email address, and more.
Profile Information
Display name
The display name is the name shown in the application for the user and consists of the first and last name.
Salutation
The salutation defined here is shown both in the signature of sent emails and in the header of the report PDF.
Signature
Here you can upload a signature in PNG format, which will appear in the report PDF. A signature can also be created easily under “Generate signature online”.
Phone number
A phone number can also be stored here, which will be used in templates as well as in the signature.
Change password
You can easily update your password here. First, the current password must be entered, followed by the new password. The new password must then be confirmed.
Two-factor authentication
Two-factor authentication can be enabled here. If activated, you will be prompted to enter a code from the Google Authenticator app each time you log in. This process increases account security.
Browser sessions
This section shows all devices currently logged into this account. In addition to the operating system and browser, the IP address is also displayed. If necessary, the button can be used to end all other browser sessions and log out those devices.
Delete account
If you wish to delete your account, this can be done by clicking the button. When deleting your account, all associated data will also be deleted, so it is recommended to back up all necessary data beforehand.
In this section you will find all settings related to members of your team, as well as information and data regarding the company. Email configuration can also be adjusted here.
Team members
A new member can be created using the button, which opens a pop-up window requesting several required details about the new member, such as first name, last name, email, etc. Fields marked with * are mandatory.
Edit existing members
Existing members can be edited in the overview by clicking the gear icon. Afterwards, the values defined during creation can be adjusted.
Delete existing members
Members can be deleted using the button located to the left of the respective entry. The action must then be confirmed in the pop-up window.
Company settings configuration
Here you can edit your default company data.
Name
The company name can be updated here.
Logo
A company logo can be uploaded here.
Additional information
Additional fields such as an address can be added here.
Evaluation configuration
You can add new evaluations using the button. These can also be deleted. An example of an evaluation would be: “Continue work: The work can proceed” in green.
Email configuration
All settings regarding emails can be configured here.
Sender address
This is the address shown to recipients as the sender.
Collection address
This is the address to which all emails from senders not listed on the whitelist will be forwarded.
Allowed recipients
Allowed recipients include the email domains that are permitted as recipients.
When you open the app for the first time, you will be greeted with a login form that allows you to sign in by entering your credentials and tapping “Continue”. If you forgot your password, you can request a reset by email via “Forgot password?”.
After successful login, you will be taken directly to an overview of your customers. At the top you will find a search bar to quickly find customers. The overview shows the short and full name, logo, and address of your customers for easy navigation. By tapping an entry you get to a list of projects assigned to that customer.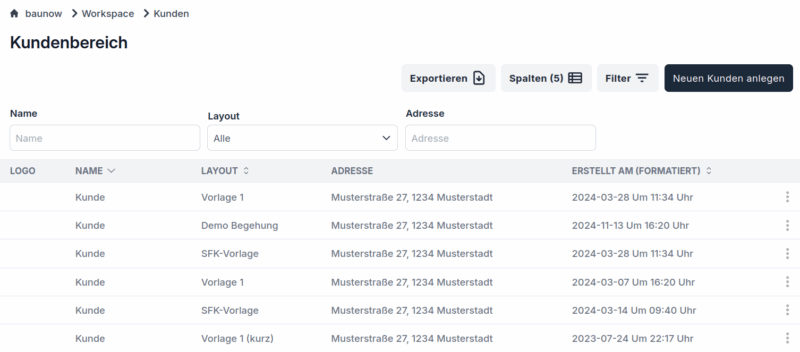
After selecting a customer, you will see an overview of the associated projects. At the top there is a search bar to filter projects. The overview shows each project’s name, address and — if available — the distance to your current location. By tapping you can view the detail view and the inspections for the respective project.
After you have selected a project, you can switch between a detailed overview of the project information and the inspections using the tabs at the top.
To create a new inspection, press the + button at the bottom right. The newly created inspection appears immediately at the top of the list.
To delete an inspection, swipe the inspection entry from right to left and tap the trash icon.
After selecting an inspection, you will see a list of all recorded issues.
To create a new issue, press the + button at the bottom left. You can then add images, description, action and more to the issue.
To delete an issue, swipe the respective entry from right to left and tap the trash icon.
To edit an existing issue, open it with a tap and update the content as needed.
To document circumstances easily, you can add up to three images per issue. While creating or editing, tap the gray area with the camera icon to take a photo, or use the “Upload image” function. The selected image will then appear at the top of the issue overview.
After adding one or more images, you can add markings or highlight specific areas. In the overview, tap the desired image to start the image editor. You can then adjust it with the integrated editor as needed. Don’t forget to save your changes by tapping the button in the top right so they are preserved.
After you have added the required images to your issue, you can use our integrated AI image analysis feature to automatically fill the remaining fields. Tap the “Analyze” button in the issue overview — the analysis starts and automatically generates a description, a title, a recommended action and matching rules based on the image contents. After you have reviewed the AI-generated entries, you can adjust them if necessary and then save the issue as usual.
If you have the plans for the inspected object available and they are uploaded in reportly, you can additionally place the issue on the plan. While creating or editing the issue, scroll to the bottom and click “Place on plan now”. A list of available plans will appear. Select the desired plan and navigate to the location of the issue. Click to set the pin and confirm your selection with the “Position” button at the bottom left.
Once you have recorded all issues, you can view a preview of the report. Go to the overview of all recorded issues and click “Show report”. In the preview you can review all entries and adjust them if necessary.
If all entries are correct, finalize the report by clicking “Complete inspection”. You will then see the intended recipients of the report; individual recipients can be deselected if needed. Click “Send report” to send the report by email.
Mobile App
The mobile app can be downloaded from the App Store or the Google Play Store.
Webapp
You can access the web app from any common browser at this link.
If you have forgotten your password, go to the login page and click the “Forgot password” button. You will be prompted to enter your email address. You will then receive an email with a link to reset your password.
All tabular data in the reportly web app can be easily downloaded via the “Export” button at the top right as a CSV or XLSX file. This allows for simple further processing in programs such as Microsoft Excel or Google Sheets.
After you have recorded all issues, you can send your inspection report by navigating to the issue overview within the current inspection. The “Show report” button appears at the bottom. Clicking it opens a preview of the automatically generated report.
To finalize the report, click “Complete inspection”. The report is then finalized and can be sent to the available participants via the “Send report” button.
There can be several reasons why an inspection report is not sent:
Not all mandatory fields are filled:
When creating the project or switching to a different template, essential information for report generation and sending may be missing. To fix this, update and complete your project or contact the responsible person.
Recipient not on the whitelist:
If the intended recipient is not on the company whitelist, emails will be intercepted for security reasons and forwarded to the collection address. In this case, allow the corresponding email domain in the company settings or contact the administrator of your baunow account.
To start the AI analysis in the mobile app, first add one or more images to your issue. Then, in the editing view, tap the orange “Analyze” button at the top — the AI will take over the analysis and fill the remaining fields.
If you want to add already taken images to your issue, do this while creating or editing the issue. Instead of tapping the camera icon, tap “Upload image”. You will then see an overview of your gallery and can select and add the desired images.
If you want to remove an already added image, press and hold the desired image and confirm the deletion in the pop-up.
To enable duplicate detection, please contact the reportly employee responsible for managing your license. Once enabled, detection runs automatically.
To activate checklists, contact the reportly employee responsible for managing your license. Afterwards, you will be able to use them in your baunow application.
Mobile App
The mobile app can be downloaded from the App Store or the Google Play Store.
Webapp
You can access the web app from any common browser at this link.
If you have questions about managing and configuring your organization, please contact manuel@reportly.app.
If you have questions about managing and configuring your inspections, please contact manuel@reportly.app.